
Felix von Luckner did not escape Motuihe Island by reaching an unguarded road. Motuihe sat in the Hauraki Gulf, so leaving the camp required a boat, and staying free required something capable of a much longer voyage.
On 13 December 1917, Luckner and ten other German prisoners and internees left the island in the camp commandant's motor launch, Pearl. Three days later they had taken control of the timber scow Moa and turned northeast toward the Kermadec Islands. Their flight ended on 21 December when the cable steamer Iris caught them after eight days at large.
At a Glance
- Escape date: 13 December 1917
- Place: Motuihe Island, Hauraki Gulf, New Zealand
- Escape group: Eleven German prisoners and internees
- First vessel: Motor launch Pearl
- Second vessel: Timber scow Moa
- Navigation: Improvised sextant and copied school-atlas map
- Destination: Kermadec Islands
- Recaptured: 21 December 1917
- Pursuer: Cable steamer Iris
- Outcome: Successful island breakout and maritime evasion, followed by recapture
From the Seeadler to Motuihe
Luckner had already travelled across much of the Pacific before becoming a prisoner in New Zealand. He commanded the German commerce raider Seeadler, which attacked Allied merchant shipping during 1917.
In August the Seeadler was wrecked at Maupihaa in the Society Islands. Luckner left the stranded ship with five men in an open boat, intending to find or capture another vessel and continue the operation. Instead, authorities arrested the party in Fiji.
They arrived in Auckland on 7 October 1917 and were sent to Motuihe, a former quarantine station converted for wartime detention. The surrounding gulf made the island naturally difficult to leave, but the camp itself was not a fortress of the kind found in later European POW systems. That distinction would matter in December.
Eleven men, not eleven identical POWs
Later shorthand sometimes describes all eleven escapees as Luckner's Seeadler crew. The contemporary military record is more complicated. The group included Luckner and Lieutenant Carl Kircheiß, naval cadets, seamen and wireless personnel, but also Albrecht von Egidy, a former Samoan government official.
The New Zealand proceedings referred to the detained population as prisoners of war and interned alien enemies. Luckner was unquestionably a German naval POW, but the escape party as a whole contained men of different wartime statuses. What is secure is the number: eleven men left Motuihe on 13 December.
Building for a sea escape
An island breakout demanded preparation for navigation as well as concealment. Motuihe heritage research records accumulated provisions and other equipment. The most important surviving object is an improvised sextant made by German cadet Walter von Zatorski.
Te Papa records that von Zatorski assembled the instrument in 1917 from scavenged and improvised materials, including part of a Primus-stove fuel tank, brass and glass. An adjusting component came from a safety-razor handle.
The sextant was not merely an example of camp handicraft. After the escape, the men used it with a map copied from a school atlas to steer toward the Kermadec Islands.
Taking the Pearl
The first escape vessel was already on the island. The commandant, Lieutenant-Colonel Charles Harcourt Turner, had access to a motor launch named Pearl. After the escape, formal charges against Turner alleged that the prisoners had been able to obtain possession of the launch and make preparations without sufficient precautions being taken.
Local reconstruction places the departure in the early evening of 13 December. The island telephone connection was cut, delaying communication with the mainland.
Eleven men boarded Pearl and moved out into the Hauraki Gulf. The launch solved the immediate problem of island confinement, but it was not a vessel on which the group could expect to cross a large stretch of the Pacific. They needed another ship.
Selected chronology
Selected chronology
Seeadler wrecked
Luckner's commerce raider was wrecked at Maupihaa in the Society Islands.
Luckner captured in Fiji
Luckner and five men were arrested after leaving Maupihaa in an open boat.
Arrival in Auckland
Luckner's party reached New Zealand and was confined on Motuihe.
Eleven men escape Motuihe
Luckner and ten other German prisoners and internees took Pearl and left the island.
Mercury Islands stage
Local historical reconstruction places the group around Red Mercury while they waited for a larger vessel.
Moa seized
The escape party brought Pearl alongside the timber scow Moa and took control of it.
Entire party recaptured
Iris found Moa in the Kermadec group and recaptured all eleven fugitives; the Moa civilians were safe.
Security proceedings
The escape led to formal inquiry and court-martial proceedings examining Motuihe's security failures.
Into the Mercury Islands
The group moved east toward the Coromandel and Mercury Islands. Motuihe's local history places the fugitives at Red Mercury Island by the following morning. Whether every later route point can be fixed precisely is less important than the operational situation they had created.
They were off Motuihe and mobile, but still close enough to New Zealand for patrols to search the surrounding islands. Pearl also depended on fuel and lacked the range and sailing characteristics needed for a prolonged ocean escape. For several days the fugitives waited for a suitable vessel.
The Moa
On Sunday, 16 December, the timber scow Moa was sailing toward Auckland with sawn timber aboard. Another scow, Rangi, was in the area. Its crew later supplied the most useful contemporary account of what they saw.
At first Moa was proceeding normally. Then it hove to as a launch approached. The observers watched the launch come alongside. Not long afterward, Moa changed direction and headed northeast with the launch being towed astern. From that moment, Luckner's party controlled the scow.
Material evidence
Tools of Escape
The objects used in an escape reveal how a plan worked under constraint.
- 01Initial breakout vessel
Motor launch Pearl
The camp commandant's launch gave the group the means to leave the island and cross the Hauraki Gulf.
- 02Long-range navigation
Improvised sextant
Walter von Zatorski built the navigation instrument from improvised materials while confined on Motuihe.
- 03Route planning
Copied school-atlas map
Te Papa records that the escapees used the sextant with a map copied from a school atlas.
- 04Ocean escape vessel
Scow Moa
The sailing scow provided greater range and carrying capacity than Pearl for the open-ocean stage.
What the witnesses could not see
Later retellings often describe the seizure of Moa as a machine-gun capture. The contemporary witnesses did not say that.
The Rangi crew was roughly five miles away. They could see the vessels manoeuvre, but they were too distant to determine whether force had been used or whether Moa's crew resisted. They reported seeing no shots.
The newspaper concluded that the circumstances suggested firearms may have been used to compel the crew, but that was an inference rather than a direct observation. The historically secure statement is that Luckner's party seized an occupied civilian vessel. A specific, witnessed machine-gun confrontation belongs to later retelling unless stronger evidence is added.
Six civilians aboard
Moa was not an empty prize. Contemporary reporting identified five adult crew members and one boy aboard the scow. The master was Captain William Bourke, a former Royal Navy man.
When Iris recaptured the vessel several days later, all six civilians were still aboard and were reported safe and well. That fact changes the human scale of the episode. The escape party had obtained the larger vessel it needed, but the voyage now also included six people who had not chosen to join it.
Problem → response
Escape was a sequence of problems
Each response solved a practical obstacle while often creating the next one.
- 01→
Obstacle
Island confinement
Motuihe's surrounding water prevented an ordinary overland escape.
Response
The group obtained Pearl and turned the water barrier into an escape route.
- 02→
Obstacle
Rapid alarm and pursuit
A functioning communication link could quickly bring mainland search resources into the gulf.
Response
The telephone connection was cut, delaying the alarm.
- 03→
Obstacle
Pearl lacked ocean range
The motor launch was poorly suited to a long Pacific voyage.
Response
The group sought and seized the larger sailing scow Moa.
- 04→
Obstacle
Open-ocean navigation
The Kermadec destination required navigation beyond coastal piloting.
Response
The group used von Zatorski's improvised sextant and copied map.
- 05→
Obstacle
Need for supplies
Seventeen people aboard Moa required food and the vessel was not suited to indefinite roaming.
Response
The escapees headed for Kermadec castaway depots, a destination authorities were also able to predict.
- 06→
Obstacle
Armed pursuit by Iris
Iris was faster and carried two six-pounder guns and additional personnel.
Response
Moa was overhauled in the Kermadecs and the escape party surrendered.
From launch to scow
Once the fugitives had Moa, the Pearl became secondary. Local history says the launch was towed for a time and subsequently lost in heavy seas. Contemporary reporting later recorded the discovery of Pearl's small dinghy near Cape Rodney, floating upside down with its line apparently broken.
The exact loss sequence is not completely documented. The important transition is clear: the escape moved from a motor launch designed for local use to a sailing scow capable of much greater range. The next problem was navigation.

A sextant made in captivity
The Kermadec Islands lie far northeast of New Zealand. Te Papa gives their distance at roughly 1000 kilometres and states that the fugitives used von Zatorski's improvised sextant together with a map copied from a school atlas to steer an accurate course.
That surviving object gives the escape an unusually direct material record. The New Zealand government confiscated the sextant after the recapture and transferred it to the Dominion Museum, Te Papa's predecessor, in 1918.
The instrument shows that the ocean stage was not simply a matter of pointing Moa northeast and hoping to see land. The party had prepared to make celestial observations and turn them into useful navigation.
Documentary reconstruction
From Motuihe to the Kermadecs
A case-local visual focused on the spatial, mechanical or evidentiary relationship established by the surviving record.
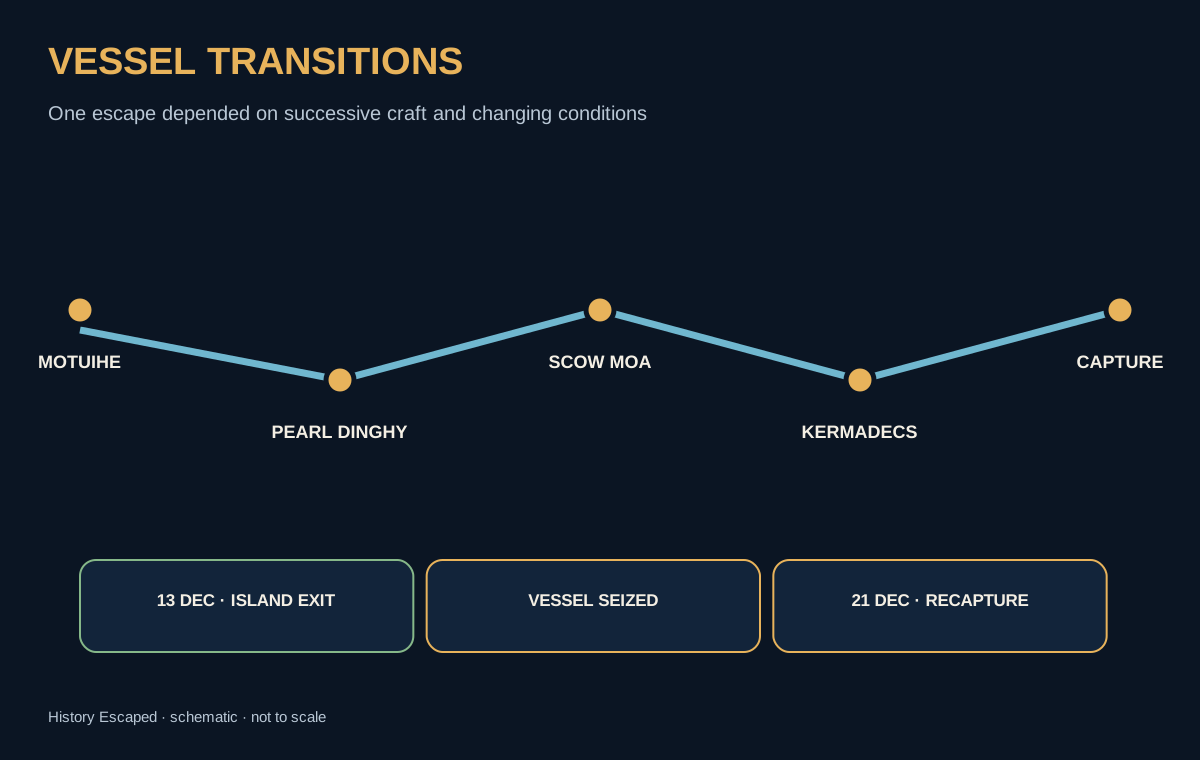
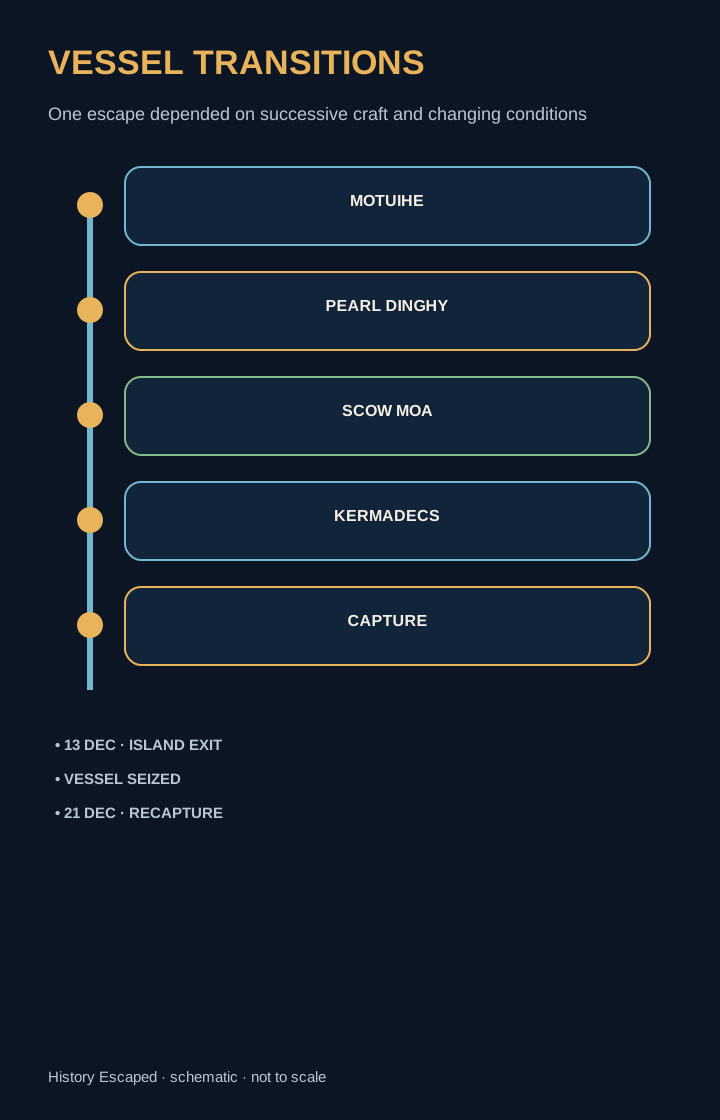
Simplified editorial reconstruction based on the cited historical record; not to scale. Uncertainty is stated directly in the visual and adjacent text.
Why the Kermadecs?
The immediate attraction was food. New Zealand maintained castaway depots on remote islands for shipwreck survivors. Authorities searching for Luckner understood that the Kermadecs offered a logical resupply point to a group travelling in an improvised escape vessel.
A later New Zealand report stated that Luckner's party took provisions from the depot on Curtis Island and transferred them to Moa. Later narratives give the plan a larger ambition: find another vessel, resume German naval operations or eventually make for home. Those intentions fit Luckner's earlier attempt to continue the war after Seeadler was wrecked, but the Kermadec supply objective is more firmly established than every later intended stage.
The search by Iris
Once New Zealand authorities concluded that the fugitives had taken Moa, the hunt moved offshore. The Pacific cable steamer Iris was fitted with two six-pounder guns and additional gun crews. It searched the Mercury and Alderman Islands before being directed northeast.
The move toward the Kermadecs was an act of prediction. A sailing scow carrying eleven fugitives and six civilians needed provisions, and the remote depots provided an obvious place to obtain them. On 21 December that prediction proved correct.
Recapture in the Kermadecs
Immediate New Zealand reporting announced that Iris had found Moa in the Kermadec group and recaptured the entire German party. All six members of the civilian crew were safe.
The first reports said relatively little about the final confrontation and indicated that the recapture had probably occurred without bloodshed. A 1940 Press Association account later supplied a more detailed sequence. It placed Moa off Curtis Island, said the scow continued under a German flag after Iris signalled it to stop, and described a warning shot fired across the bows before surrender.
That later account is strong evidence, but it should not be mistaken for an immediate 1917 action log. The result itself is beyond dispute: all eleven fugitives were back in custody on 21 December.
The final accounting
Outcome
Escapees from Motuihe
Eleven German prisoners and internees left the island aboard Pearl.
Civilian Moa complement
Five adult crew members and one boy were aboard the seized scow and were found safe.
Fugitives recaptured
The entire escape party was recaptured by Iris on 21 December.
Eight days at large
Luckner's party had escaped Motuihe on 13 December and was recaptured on 21 December. During those eight days, they crossed the Hauraki Gulf, acquired a second vessel, navigated hundreds of kilometres into the Pacific and reached the remote Kermadec group.
The classification therefore requires more precision than simply "successful" or "failed." The breakout from Motuihe succeeded. The seizure of a vessel and long-range evasion succeeded. The attempt to turn that breakout into durable freedom failed. All eleven were recaptured.
A military inquiry follows
New Zealand authorities treated the escape as a security failure. A military court examined Motuihe's guard arrangements, the prisoners' access to the commandant's launch and whether stronger precautions should have been taken after the arrival of Luckner and other Seeadler-associated prisoners.
Turner later faced court-martial charges alleging that his handling of the camp had allowed the prisoners to obtain the launch and prepare their escape. The official response is important because it strips away the later romance. To the people responsible for wartime detention, the central question was not whether Luckner's escape was audacious. It was how eleven prisoners and internees had obtained a government-associated launch and remained beyond control for eight days.
Evidence discipline
What the record supports
Status labels distinguish secure conclusions from uncertainty and rejected claims. Color is never the only signal.
DOCUMENTED
Eleven German prisoners and internees escaped Motuihe on 13 December 1917 by taking the camp commandant's launch.
Contemporary inquiry and court-martial reporting lists the escapees and explicitly describes their access to the launch; New Zealand government history confirms the date.
Sources: SRC-001, SRC-004, SRC-010MYTH
All eleven escapees were combatant POWs from Seeadler.
Official proceedings describe a mixed group of prisoners of war and interned alien enemies, including individuals with different wartime statuses.
Sources: SRC-004DOCUMENTED
Walter von Zatorski's improvised sextant was used on the Kermadec voyage.
Te Papa preserves the confiscated instrument and states that it was used with a copied school-atlas map to navigate toward the Kermadecs.
Sources: SRC-005LATER CLAIM
Luckner definitely used a machine gun to seize Moa.
Contemporary observers on another scow saw no shots and were too far away to determine the exact coercion. They inferred only that firearms may have been threatened.
Sources: SRC-003MYTH
Moa was empty when seized.
Contemporary reporting identifies five adult crew members and a boy aboard the scow; all six were safe at recapture.
Sources: SRC-002, SRC-003WELL-SUPPORTED
The Kermadec Islands and their provision depots were an immediate objective.
Authorities predicted the Kermadecs because of the depots, Te Papa confirms the navigation route, and later reporting states that stores were taken from Curtis Island.
Sources: SRC-002, SRC-005, SRC-012LATER CLAIM
Luckner's complete post-Kermadec strategy is fully documented.
Later narratives describe plans to capture another large vessel and resume operations, but the contemporary evidence is firmer for the Kermadec resupply objective than for every later intended stage.
Sources: SRC-007, SRC-008WELL-SUPPORTED
Iris fired a warning shot across Moa's bows immediately before surrender.
A 1940 Press Association retrospective gives this sequence; immediate 1917 reporting initially said detailed circumstances were sparse.
Sources: SRC-002, SRC-009MYTH
The Motuihe escape produced lasting freedom.
The breakout succeeded, but all eleven fugitives were recaptured eight days later.
Sources: SRC-001, SRC-002MYTH
Luckner's later adventure narratives can be accepted without corroboration.
Modern military scholarship explicitly warns that historians have serious doubts about many stories attached to Luckner's later public legend.
Sources: SRC-008Rīpapa and return
Luckner was not immediately returned to exactly the same conditions at Motuihe. After recapture he was transferred to Rīpapa Island in Lyttelton Harbour, a more secure detention site. He was later returned to Motuihe and remained in New Zealand custody through the end of the war.
In later life he built an international reputation around the image of the daring, supposedly chivalrous "Sea Devil." Modern military scholarship has warned that many stories attached to that reputation are difficult to verify.
The Motuihe escape does not need the legend. Its contemporary New Zealand record is already extraordinary.
What later versions simplify
The story is often condensed into a sequence of colorful objects: a stolen launch, a machine gun, a homemade sextant, a captured scow and a chase to the Kermadecs. Those elements do not all rest on equal evidence.
The eleven escapees, Pearl, Moa, the Kermadec route, von Zatorski's sextant, Iris and the 21 December recapture are strongly documented. The specific machine-gun tableau during the Moa seizure is not directly witnessed in the contemporary account.
The immediate Kermadec resupply objective is stronger than the full later story of how Luckner hoped eventually to re-enter the war. The warning shot during recapture is strong retrospective evidence rather than an immediate newspaper detail. Keeping those differences visible produces a more accurate escape story.
Why it worked for eight days
The first advantage was access to a launch. Water surrounded Motuihe, but once Pearl was available the barrier became a route.
The second advantage was delayed communication. Cutting the island's telephone connection slowed the alarm and let the launch build distance.
The third advantage was maritime competence. Luckner was an experienced seaman, and other men in the group supplied technical knowledge. Von Zatorski's sextant converted improvised camp materials into a functional navigation tool.
The fourth advantage was vessel substitution. Pearl was enough to escape the island. Moa was enough to attempt a much larger voyage.
That same escalation also made the fugitives easier to predict. A coastal scow carrying seventeen people needed provisions. The Kermadec castaway depots provided both a resource and a clue.
Pearl, Moa and Iris
The clearest way to understand the Motuihe escape is through the three vessels that defined it. Pearl carried the fugitives away from confinement.
Moa carried the escape into the open Pacific. Iris brought it to an end.
Luckner's group solved the physical problem of leaving Motuihe and the navigational problem of reaching remote islands. It did not solve the strategic problem of remaining beyond the reach of a state that could anticipate where an under-supplied scow was likely to go. On 21 December, the place chosen to keep the escape alive became the place where it ended.